The I/O Tables you have created to this point all send data to an instrument. The next step is reading data from an instrument, which typically involves sending out instructions to the instrument to first provide the data and then read the data.
1. Create a new I/O Table and name it Measure.
2. Create an Output Operation and enter READ? as the argument.
3. Create a Send Operation. These two operations direct the DMM to send data back over the bus. You need to read this data into ATEasy.
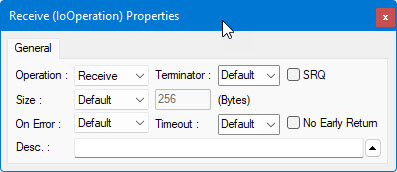
4. Create a third operation. Change its type to Receive from the operation properties window as shown here:
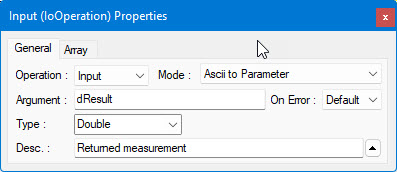
5. Create another operation and change the operation type to Input. Leave the Mode as ASCII to Parameter, which causes ATEasy to convert ASCII data in the buffer to the parameter type you select. Enter dResult in the Argument. The parameter type should be set to Double by default. Enter the description of the parameter as: Returned measurement. The Input properties window should look like the following:
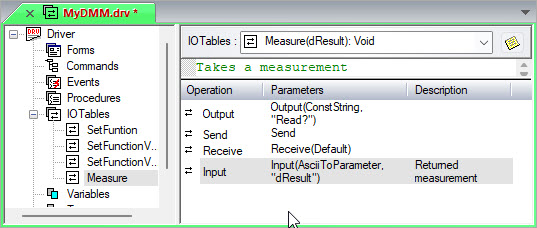
This I/O Table is now complete. When called, ATEasy first sends a string (:READ?) to the DMM and then reads back data and converts the data from ASCII to the parameter dResult of type double.
As a quick check, the driver's tree view in the document view should now have the four I/O Tables and look as illustrated below:
In Calling an I/O Table from a Test, you will call the I/O table from a new test that you will create in MyProgram. By default, ATEasy does not export I/O Tables to other modules. Normally I/O tables are used only within the driver by Commands. You can override this behavior by making the I/O Table public, so you can use it from other modules.
1. Right-click on the SetFunctionVDC,
and select Properties ![]() from the context menu.
from the context menu.
2. Check the Public checkbox. This will make the I/O table visible to other modules.
3. Repeat step 2 for the rest of the I/O tables.