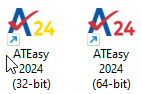
Once ATEasy has been set up, the following ATEasy icons appears on the desktop.
In this guide we will be using the 32-bit IDE (development environment) used to create 32-bit Windows applications. Similar steps can be taken using the 64-bit IDE.
Note: ATEasy 2021/v11 or newer were added 64-bit IDE, prior version had only 32-bit IDE.
1. Double-click the ATEasy 2024 (32-bit) icon or, select it from the Marvin Test Solutions ATEasy 2024 menu on the Windows Start menu.
The first time you start the program, the following screen appears:
![]()
This screen represents the ATEasy Integrated Development Environment (IDE). First the main window displays two empty windows (Workspace and Log) and the Startup dialog. The Startup dialog allows you to create a new application using the application wizard, it also let you open recent, drivers and examples workspace and project files. The Workspace window displays objects representing document shortcuts and objects opened in the IDE. The Client Area is where you will do most of your work (adding and editing code, etc.). The Log window is displayed on the client area and shows the Test Log tab that is used to record print statements that your application may have or the default output of a test program. These areas will be covered more fully later in this chapter.
Before creating your first application, you must learn about the application types available when you use the ATEasy Application Wizard to create the application.