You can use the Tools menu to run an external application by creating a new option for that menu as follows:
1. Display the Customize dialog box as explained in Customizing the Environment.
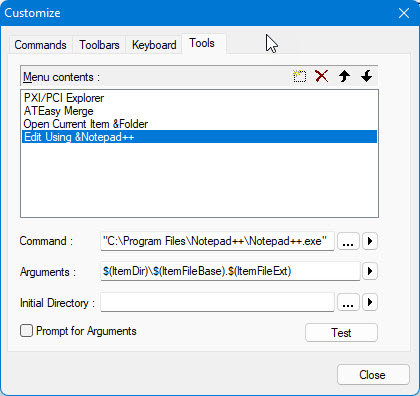
2. Click the Tools tab to display the following:
3. Click
the New button  .
A text bar appears in the Menu Contents edit box.
.
A text bar appears in the Menu Contents edit box.
4. Enter a name for the menu option. Use the ampersand (&) before the letter that you want to underline. For example, to create the menu option "Notepad" (with the underline "N"), enter the name "&Notepad".
5. Press the Enter key. The Command, Arguments, and Initial Directory boxes are enabled.
6. Click
the Command button to display
the Windows file directory. Select the program to run when the menu option
you created is selected. For example, you can select Microsoft Paint or
Notepad.You can use the Browse button  to locate and
select the file, or use the Right arrow button
to locate and
select the file, or use the Right arrow button  to create
an expression that uses one of the predefined Path
Variables (v7.0/v9.0).
to create
an expression that uses one of the predefined Path
Variables (v7.0/v9.0).
7. If the program requires any arguments, enter them in the Arguments field. Use the Arrow button to select from a list of predefined arguments. You can add more than one. For a complete list of predefined arguments and their definitions, see Arguments for External Tools.
8. If needed, specify an initial directory by clicking the Initial Directory button and selecting a directory. The Initial directory is the directory from where the command is executed or changed before an application is run.
9. Add
menu items as necessary. To delete an item, click on it to select it and
click the Delete button  . To move an item in the
list, click on it to select it and then click the Move
Up
. To move an item in the
list, click on it to select it and then click the Move
Up  or Move
Down
or Move
Down  button.
10. Use the Test button to try the external tool you have just created (v9.0).
11. To close the dialog box, click the Close button. The Menu options you created now appear at the bottom of the Tools menu and are available for use.