You can use the Library Wizard to guide yourself through each step of creating a DLL project. Each of the dialogs in the Library Wizard is self-documenting, presenting you with a series of dialogs (similar to Application Wizard) that result in the creation of a new ATEasy project with System, and optional Driver and Program modules.
This project's target type will be set to Dynamic Link Library (DLL).
The Library Wizard dialogs/steps to create a new DLL project:
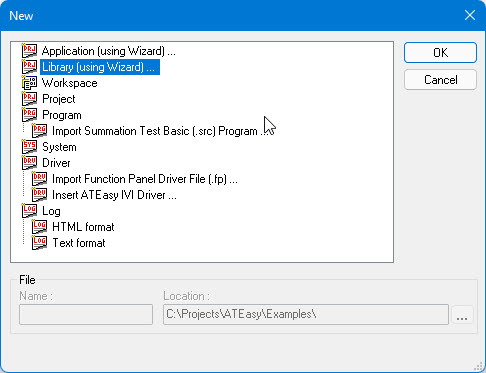
From the File menu, select New. The following dialog displays:
Select Library Wizard and click OK. ATEasy displays the Library Wizard - Project dialog:
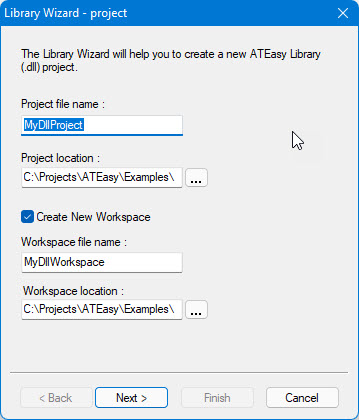
In Project File Name, type the file name that you want to use for the new project.
In Project Location, specify the location on your hard disk where you want to create the new project. You can either type the full path name of the project's location, or use the Browse button to navigate to the location.
If you want to put the new project into a new workspace, click Create New Workspace. You can enter new workspace name and location.
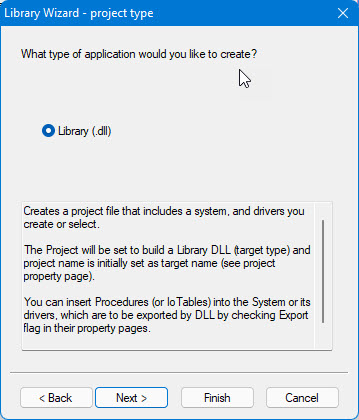
Click Next. ATEasy displays the Library Wizard - Project Type dialog with only type Library (DLL) having been preset by ATEasy:
Click
Next. ATEasy
displays the Library Wizard - System
dialog:
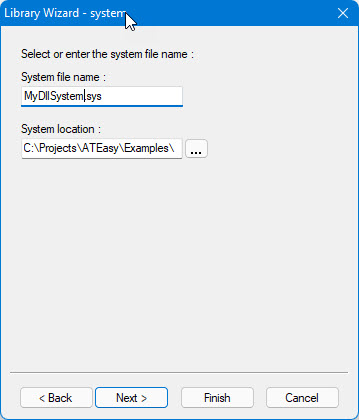
In System File Name, type the file name that you want to use for the system module. You can create a new system or use an existing one.
In System Location, specify the location on your hard disk where you want to create a new system. If you want to use an existing system, specify the location of that system file. In either case, you can type the full path of the system location or use the Browse button to navigate to the location.
Click
Next. ATEasy
displays the Library Wizard
- Driver dialog:
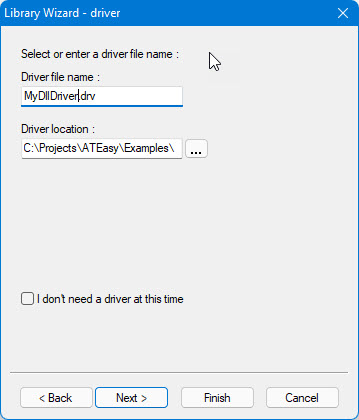
Creating a new driver is optional. You can skip by checking the checkbox
above.
Click
Next. ATEasy
displays the Library Wizard
- Program dialog:
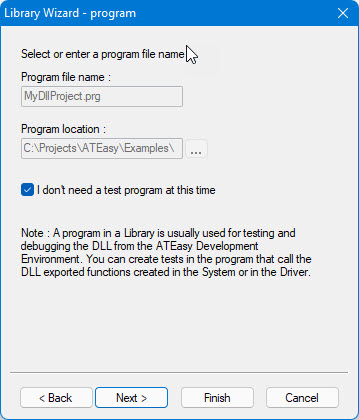
You can optionally create new program. Programs in the DLL project
are solely used for testing and debugging purposes, described as in
the note above.
Click Next.
ATEasy
displays the Library Wizard - Select
Drivers dialog:

To add a driver, click New
(![]() ), then type the full
path name of the driver location or use the Browse
button to navigate to the location and select the driver.
), then type the full
path name of the driver location or use the Browse
button to navigate to the location and select the driver.
Click
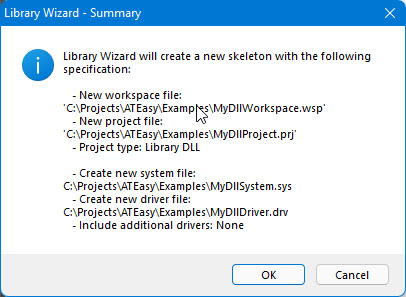
Finish. The Library
Wizard displays a confirmation dialog box listing the choices you
have made through the Library Wizard. Click OK
to create the files required and selected for the new DLL project.
After ATEasy generates the DLL project files. The files are loaded to the Integrated Development Environment (IDE) and the Workspace window displays the newly created project file and its contents. New modules are displayed in Document View windows.