You may create an application in one of two ways. You may select New from the File menu to create a project. You may then manually insert new or existing programs as well as a system to the project. Alternatively, you may get a "jump start" and use the Application Wizard to create your application.
1. Start the Application Wizard.
2. Select New
from the File menu or click ![]() from the Standard toolbar or just use the Startup
dialog shown in the previous section.
from the Standard toolbar or just use the Startup
dialog shown in the previous section.
The New dialog box displays as shown here:
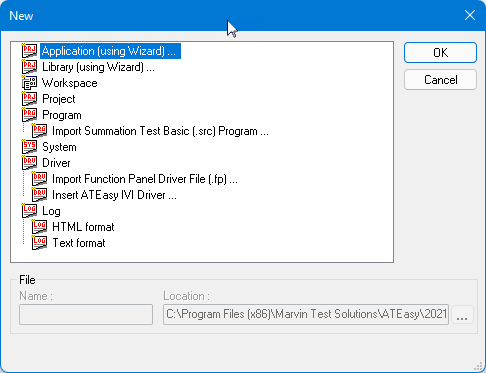
3. Select Application Wizard from the list and click OK. The Application Wizard appears.
1. Type MyProject for the project file name and C:\MyProject for the project location as shown below. ATEasy creates the folder if it does not exist. You can create the folder also on your desktop if you don’t have a write permission to C:\.
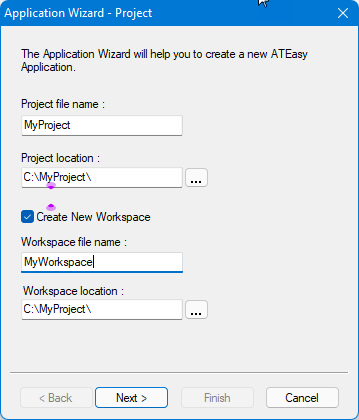
2. Make sure the checkbox is selected for Create New Workspace and type the Workspace name and folder as shown here.
3. Press Enter or click Next to continue to the next step.
Note: By default, ATEasy files are created in binary format. ATEasy files can be saved in the Text format. This allows merging when several users are working on the same file. It also offers better support for version control software such as Microsoft Visual Source Safe.
1. Select Test Application as the project type.
2. Uncheck Include the Test Executive driver, the Profile driver, and the Fault Analysis driver. The dialog should look as follows:
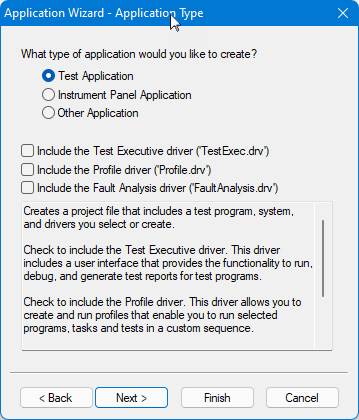
3. Click Next to continue.
See Adding the Test Executive Driver for more information regarding the driver.
1. The next screen sets the program file name and defaults to the project name and location (C:\MyProject\MyProject.prg). Rename the Program name to MyProgram.prg and click Next to continue.
2. The next screen sets the system file name and defaults again to the project name and location (C:\MyProject\MyProject.sys). Rename the System name to MySystem.prg and click Next to continue.
3. The last screen in the Application Wizard allows you
to select drivers. While you are not
going to add any drivers here, to access a list of drivers, click the
new driver icon ![]() on the toolbar.
The driver list is now available. Click the ellipse button
on the toolbar.
The driver list is now available. Click the ellipse button ![]() to obtain
a list of drivers (the default driver location is the ATEasy
Drivers folder (for example, C:\Program
Files\ATEasy\Drivers).
to obtain
a list of drivers (the default driver location is the ATEasy
Drivers folder (for example, C:\Program
Files\ATEasy\Drivers).
4. Click Finish. The Application Wizard displays a confirming dialog box. This box lists the choices you have made through Application Wizard. Click OK to create the files required for the new application.
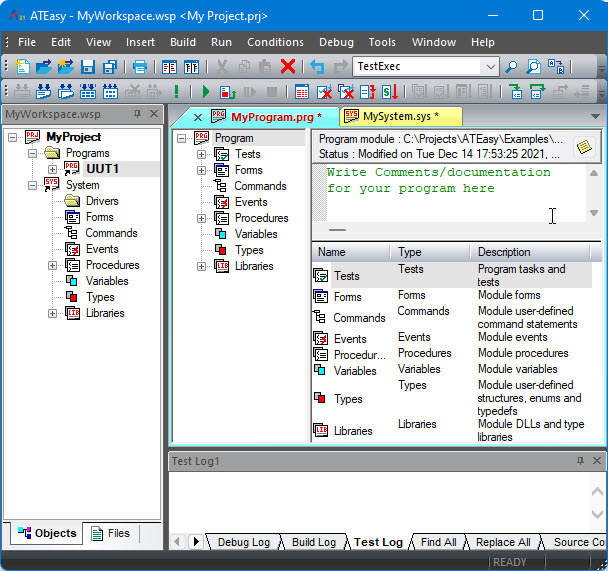
After ATEasy generates the application files, the files are loaded to the IDE and the Workspace window displays the newly created project file and its contents. The two new modules, the program, MyProgram.prg, and the new system, MySystem.sys, are displayed in Document Views windows. Each window is divided into tree and object views with a splitter that can be moved to separate the two views.