The Test Executive driver included with ATEasy provides a multi-user environment. Within, a user with administrator rights can create user groups and user accounts. User group such as Testers, Supervisors, Administrators can be assigned a customized set of command menus, toolbars, options and different levels of privileges. This article with cover activating these features and configuring user groups within the test executive.
The TestExec.drv ATEasy software driver includes integrated support for multi-user features which are turned off by default. To activate these features, you only need to enter the location of your users file (.USR) into the TestExec Driver Shortcut parameters page. The parameter UsersFile, which is empty by default, can be changed to the absolute or relative location of a file i.e. 'C:\Windows\System32\Ateasy.usr'
Ideally, a Users file would be located on a network drive where it would be accessible by all of the ATEasy developers and testers within an organization, but write access could be controlled and given to project administrators. For the purposes of this demo, which can be done locally, it is sufficient to use a user file that is stored locally.
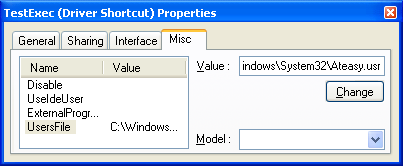
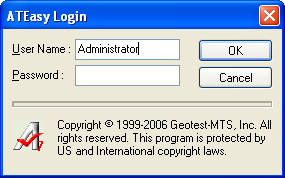
Configuring the user groups within your Test ExecutiveNow that the multi-user features have been enabled, you will be prompted with a User Login Dialog when you attempt to start your program. If you are using the multi-user features for the first time, you will need to log in with one of the user file's administrator accounts to configure each user's privileges.

To begin configuring your user groups, log in as an administrator. If you are using the user file located at 'C:\Windows\System32\Ateasy.usr' and you have never changed the password on this file, the default administrator account user name is Administrator. Leave the password blank and hit OK to log in.
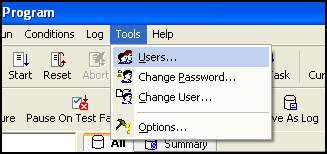
Once logged in as Administrator with multi-user features enabled, you should have a new menu bar item: Tools | Users...
This is your portal for configuring users groups. Clicking this item will allow you access the Test Executive's Users Dialog.
The Users Dialog is where access levels, UI configuration, and Test Executive customization is handled in multi-user mode. Layouts and privileges are differentiated for your users. The User Dialog window has eight pages, all of which are documented in the Test Executive help.
Users Dialog: Groups Page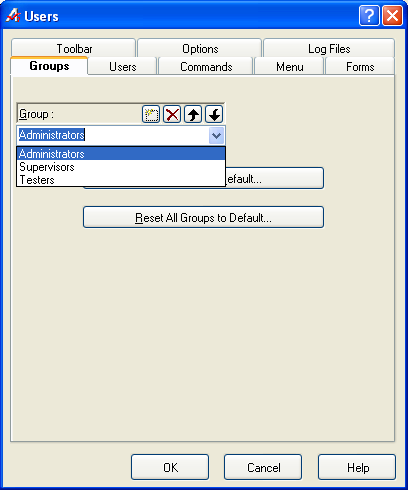
By default, you are provided with three User Groups with which to organize your ATEasy users. When the Test Executive activates a User file for the first time, it will automatically create three default user groups with their own set of command menus, toolbars, and options.
Administrators - Has all of the functions available in a Test Executive that is not using the multi-user feature. Also has ability to configure the user file from within the Test Executive.
Supervisors - Same rights and default layout as the Administrator account, but does not have the ability to access the Users dialog.
Testers - This user group was designed to allow selection of program / profile, execution of that selection and test log archiving.
Each individual user must be placed into one of these User Groups before they can access the Test Executive. Alternatively, a custom User Group can be created and assigned to a user. The Groups page is where user groups can be created / modified / deleted.
Users Dialog: Users Page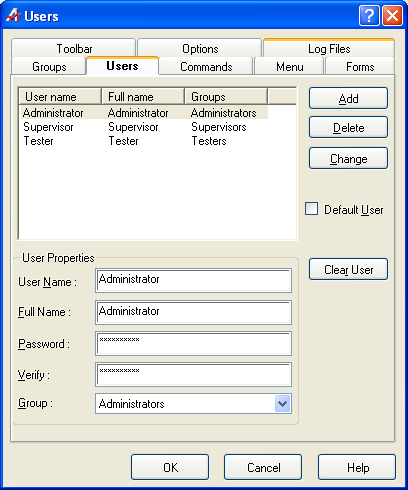
The Users Page allows the administrator to see all of the users associated with the current USR file. Users can be added and deleted here, passwords can be changed, and users can be assigned to user groups. Also, one user can be selected as a default user, allowing automatic login when the test program is started. The default user account can not have a password, however.
The rest of the pages in the Users Dialog deal with configuring each user groups layout. The details of these pages are covered in the Test Executive help under the keywords "Users Dialog".
ExampleThe following example will demonstrate using the administrator account to configure the layout of the tester account. The tester account, by default, has only Continuous and Task By Task run conditions available. We will be adding the Test By Test mode.
- Start an ATEasy project and include the TestExec software driver. Make sure the UsersFile parameter is set to the ATEasy.usr file in your Window's System folder.
- Log in to the project as an Administrator.
- Open the Users Dialog (Tools | Users...)
- Click the drop-down box labeled Group: and change the active user group to Testers.
- In the available commands box, click the plus icon by Conditions... to expand the list.
- Locate and click on the item Test By Test. Click it and click the Add -> button to add the item to the active toolbar for Testers.
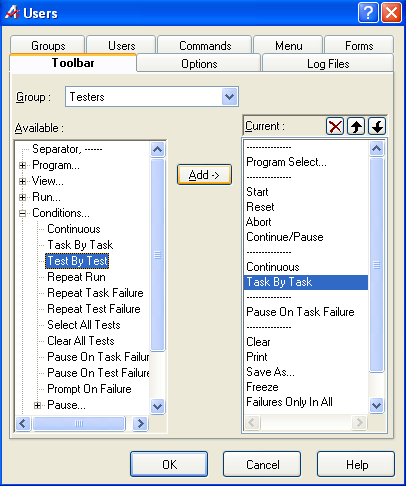
We have added the button to the toolbar, but it is not enabled yet.
- Click the drop-down box labeled User Group: and change the active user group to Testers.
- In the available commands box, click the plus icon by Conditions... to expand the list.
- Click the item Test By Test and click the Enable checkbox to enable this item.
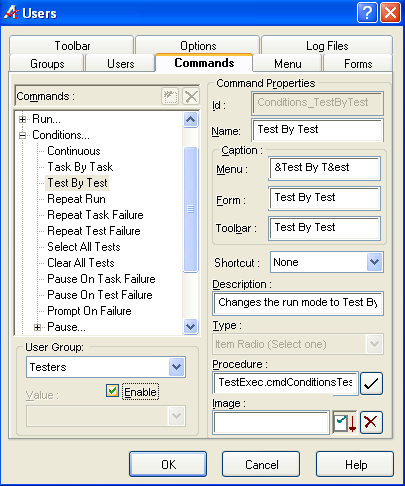
If you use Tools | Change User... to log into your Tester account, you will notice that the Task By Task option has been added to the toolbar. In this manner, other items can be added and removed from the ToolBar. The process is very similar for menu items as well.
|